Entering data into a spreadsheet is a piece of cake! Just follow these simple steps, and you’ll be a spreadsheet wizard in no time. Imagine we’re working with a small business selling delicious homemade cookies. We’ll be using a spreadsheet to track the sales.
- Open your spreadsheet software (like Microsoft Excel, Google Sheets, or Apple Numbers).
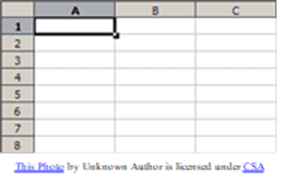
- In the spreadsheet, you’ll see a grid of cells organized by rows and columns. Rows are represented by numbers (1, 2, 3, etc.) on the left, and columns are represented by letters (A, B, C, etc.) at the top. Each cell has a unique address, such as A1 or B2, which is a combination of its column letter and row number.
- To enter data into a cell, simply click on the desired cell with your mouse. For example, let’s click on cell A1.
- Now, you can type in your data. In our case, we’ll type “Date” in cell A1 since we want to track the date of each sale. Press “Enter” or “Return” on your keyboard, and you’ll notice that the cell now contains your data, and the selection moves down to the next cell.
- Continue adding data to other cells by clicking on them and typing the information. For example, in cell A2, type the date of the first sale (e.g., “04/01/2023”), and in cell B1, type “Cookies Sold.”
- To input numbers or formulas, follow the same process. In our case, let’s say we sold 20 cookies on April 1st, 2023. Click on cell B2, type “20”, and press “Enter.”
Bonus: Using Autofill to Save Time
Now that you have a basic understanding of entering data into a spreadsheet, let’s learn how to use the Autofill feature to save time and make your data entry even more efficient. Autofill is a powerful tool that automatically fills in cells with a pattern, sequence, or formula based on the data you’ve already entered. This can be especially helpful for entering dates, numbers, or repetitive information.
Let’s see how to use Autofill in our cookie sales spreadsheet:
- In our example, we’ve already entered the date “04/01/2023” in cell A2. Now, let’s say you want to enter the dates for the entire week. Click on cell A2 to select it.
- Move your cursor to the bottom-right corner of the selected cell (A2) until it changes into a small black cross or plus sign. This is the Autofill handle.
- Click and hold the left mouse button on the Autofill handle, then drag it down vertically through the cells you want to fill. In our case, drag it down to cell A8 to fill in the dates for a week.
- Release the mouse button, and you’ll see that the cells are now filled with consecutive dates, starting from “04/01/2023” and ending with “04/07/2023.”
- Autofill can also be used for other types of data, such as numbers or text with a pattern. For example, if you have a list of different cookie types like “Chocolate Chip,” “Oatmeal Raisin,” and “Sugar” in cells C1, C2, and C3, you can use Autofill to repeat the list in cells C4, C5, and C6. Just select cells C1 to C3, then drag the Autofill handle down to cell C6.
And that’s it! You’ve successfully entered data into a cell in a spreadsheet. Now, you can easily keep track of your cookie sales and watch your business grow! Keep practicing, and you’ll become a spreadsheet master in no time.
